Unlock the secrets to a thriving, bubbly easy sourdough starter with our comprehensive starter guide, ensuring you’re ready to bake delicious, crispy sourdough bread right at home.
Ignite Your Baking Journey with an Easy Sourdough Starter
Welcome, aspiring baker! The journey to baking incredible homemade sourdough bread begins with one fundamental element: a vibrant, active sourdough starter. Many believe creating a starter is complex, but with this easy sourdough guide, we’re here to demystify the process and set you on the path to baking success. Imagine the aroma of freshly baked bread filling your kitchen, a tangible reward from your very own easy sourdough starter.
Starting your sourdough journey is an exciting step into the world of natural fermentation. This detailed sourdough recipe will walk you through every stage, transforming simple flour and water into a powerful leavening agent. Soon, you’ll be crafting your own perfect sourdough loaves, a truly delicious sourdough experience.
Essential Kitchen Tools for Your Sourdough Adventure
While creating an easy sourdough starter is surprisingly simple, having the right tools can make your baking journey smoother and more enjoyable. Here are a few recommendations that will come in handy not just for your starter, but for all your culinary adventures.
- A reliable kitchen scale is paramount for precise measurements in sourdough baking. For keeping your kitchen organized and your ingredients fresh, consider the Rubbermaid Brilliance Glass Storage Set of 9. These crystal clear, leak-proof, and stackable containers are perfect for storing flours, grains, or even your starter discard in the fridge.
- For preparing larger batches of sourdough bread dough or other complex recipes, a powerful food processor can be a game-changer. The Cuisinart 8 Cup Food Processor is a meal prep essential, offering fast chopping, slicing, and shredding capabilities that save significant time.
- And for those times you want to prep ingredients ahead or store bulk purchases, a vacuum sealer can extend freshness considerably. A FoodSaver Vacuum Sealer Machine keeps ingredients fresh up to 5x longer, preventing freezer burn and making bulk buying economical.
These tools, while not strictly required for your initial easy sourdough starter, will undoubtedly enhance your overall baking and cooking efficiency. For more delicious recipes and kitchen tips, you can explore our full recipe index.
Ingredients for Your Easy Sourdough Starter
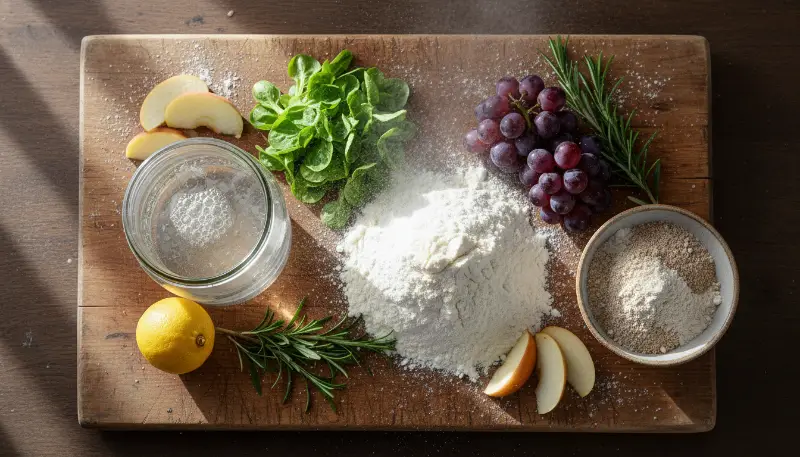
The beauty of a sourdough starter lies in its simplicity. You only need two core ingredients:
- Flour:
- Unbleached All-Purpose Flour (a good staple)
- Whole Wheat Flour (often recommended for an initial boost due to higher microbial content)
- Rye Flour (can be used alone or in blends for a robust, active sourdough starter)
- Bread Flour (unbleached, can also be used)
- Organic flour is frequently recommended for the best results, as it tends to be less processed.
- Water:
- Filtered Water
- Bottled Water
- De-chlorinated Tap Water (simply let tap water sit out uncovered for 24 hours)
- Mineral Water (some bakers prefer specific brands like San Pellegrino for its mineral profile)
Note: Some older or faster recipes might suggest active dry yeast to jumpstart fermentation. However, to create a truly traditional, natural sourdough starter, we rely solely on the wild yeasts present in flour and air. Adding packaged yeast defeats the purpose of cultivating your unique wild yeast culture for a perfect sourdough.
Step-by-Step Instructions: Building Your Easy Sourdough Starter
Patience and consistency are your best friends in this process. Expect your starter to be ready in about 7-14 days.
Equipment Needed:
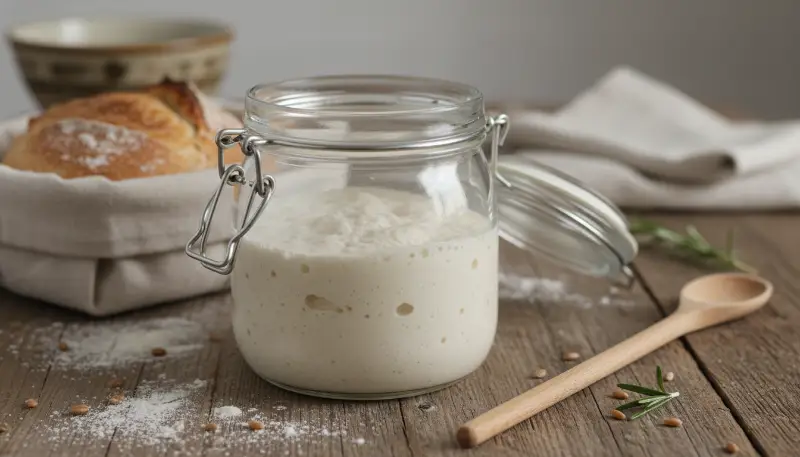
- Clean glass jar (clear for easy observation, with a loose-fitting lid or breathable cloth)
- Kitchen scale (essential for precise measurements)
- Spoon or spatula for mixing
- Rubber band or marker to track growth
Preparation (Overall duration: 7-14 days):
- Maintain Warmth: Sourdough starters thrive in warm environments, ideally 70-80°F (21-26°C). Find a warm spot in your kitchen, such as near the oven, on top of the refrigerator, or consider using a proofing box. Cooler temperatures will significantly slow down the fermentation process.
- De-chlorinate Water: If using tap water, fill a container and let it sit uncovered for 24 hours. This allows chlorine, which can inhibit yeast activity, to dissipate.
Daily Steps for Your Easy Sourdough Starter:
Day 1: Initial Mix
- In a clean glass jar, combine equal parts by weight of flour and water. A good starting point is 60g (½ cup) flour and 60g (¼ cup to 6 tablespoons) water.
- Stir thoroughly until there are no dry lumps and the mixture is well combined, resembling a thick pancake batter.
- Cover the jar loosely with a lid, cheesecloth, or a clean towel secured with a rubber band. This allows air circulation while keeping contaminants out.
- Place the jar in your chosen warm spot (75-80°F or 24-26°C) for 24 hours.
Day 2: Rest and Observe
- Stir the mixture gently to incorporate air.
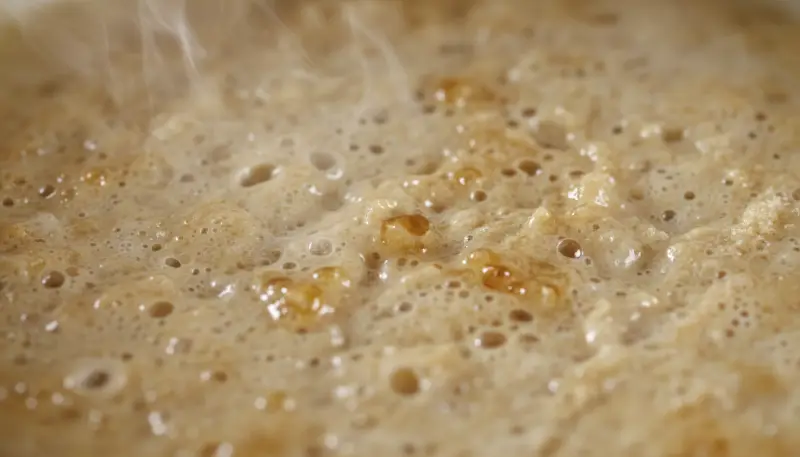
- Cover and let it rest for another 24 hours in the warm spot. At this stage, you might see minimal activity or small bubbles forming, which is completely normal.
Day 3-7 (or until active): Daily Feedings with Discard
- Around the same time each day, discard a significant portion of your starter. Many recipes recommend discarding all but 2 tablespoons (around 50-60g) or half of the mixture. This step is crucial to concentrate the yeast and bacteria, preventing your starter from becoming too acidic or diluted.
- Feed the remaining starter with fresh flour and water. A common feeding ratio is 1:1:1 (starter:flour:water by weight). For example, if you kept 60g of starter, feed it 60g flour and 60g water.
- Mix thoroughly, scraping down the sides of the jar.
- Cover loosely and place back in the warm spot for 24 hours.
- During these days, you should begin to see consistent bubbling, a slight rise, and a mildly fermented aroma developing. Use a rubber band to mark the starter’s level after feeding to observe its rise and fall.
Day 7-14 (or until mature): Consistency and Readiness
- Continue daily discarding and feeding. Your easy sourdough starter should consistently double in size within 4-8 hours after feeding and be full of visible bubbles throughout.
- It will develop a pleasant, tangy, and slightly sour aroma.
- Float Test: A reliable test for readiness is to drop a small spoonful of active, bubbly starter into a cup of room-temperature water. If it floats, your starter is full of carbon dioxide gases from fermentation and is ready to use for your sourdough bread. If it sinks, continue feeding it daily until it consistently floats.
Maintenance for Your Established Sourdough Starter:
- Once your starter is robust and established, feed it daily if kept at room temperature.
- Alternatively, you can store it in the refrigerator to slow down its activity and feed it weekly.
- When storing in the refrigerator, always feed it before putting it away. To revive it for baking, bring it to room temperature and perform a few regular feedings until it’s active and passes the float test again.
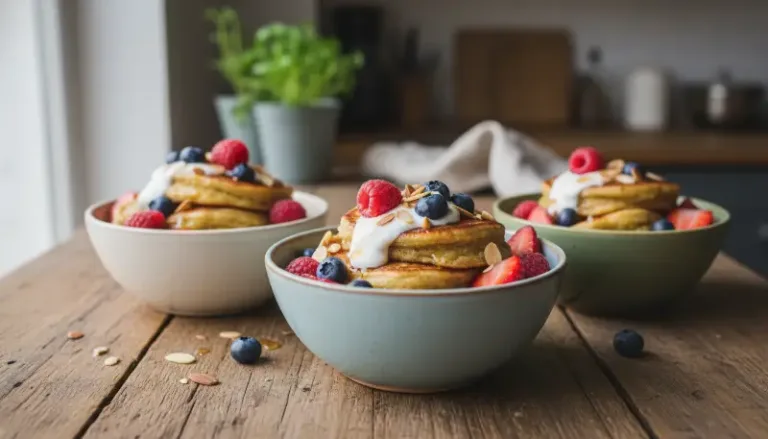
- Don’t waste your discarded starter! It can be used in a variety of delicious sourdough recipes like pancakes, muffins, pizza crust, crackers, and more, adding a wonderful tangy flavor. For ideas, browse our collection of creative discard recipes.
Frequently Asked Questions About Your Easy Sourdough Starter
1. How do I know when my sourdough starter is ready to use?
Your starter is ready when it consistently doubles in size after a few consecutive feedings, shows small bubbles on the surface and sides, has a pleasant tangy aroma, and successfully passes the float test (a dollop floats in water).
2. What kind of flour should I use for my sourdough starter?
A mix of unbleached all-purpose and whole wheat or rye flour is often recommended. Whole grain flours can give a boost to initial fermentation due to their higher nutrient content. Unbleached flour is generally preferred over bleached.
3. What kind of water should I use?
Filtered, bottled, or de-chlorinated tap water (left out for 24 hours to allow chlorine to dissipate) are suitable. Distilled water is not recommended as it lacks essential minerals that wild yeasts thrive on.
4. What is the ideal temperature for a sourdough starter?
Sourdough starters thrive in warm environments, ideally between 70-80°F (21-26°C). This temperature range significantly encourages optimal yeast and bacterial fermentation for a vibrant starter.
5. How often should I feed my sourdough starter?
During the initial creation phase, feed your easy sourdough starter daily. Once established, feed daily if kept at room temperature, or weekly if stored in the refrigerator.
6. What if my sourdough starter isn’t bubbling or rising?
Lack of activity is most often due to low temperatures. Try moving your starter to a warmer spot or using slightly warmer water for feedings. Consistency in feeding at regular intervals is also key to encouraging activity. Patience is vital!
7. What is the liquid on top of my sourdough starter (hooch)?
This dark liquid, known as hooch, indicates your starter is hungry and needs to be fed. Simply stir it back in (it adds flavor!) and feed your starter as usual. A strong, dark hooch suggests it’s very hungry.
8. Can I refrigerate my sourdough starter? How do I revive it?
Yes, you can refrigerate an established starter to slow down its activity and reduce feeding frequency to once a week. To revive it, bring it to room temperature and perform a few regular feedings (daily) until it’s consistently active and bubbly again.
9. What can I do with sourdough starter discard?
Sourdough discard can be used in a delightful variety of recipes beyond traditional sourdough bread, such as pancakes, waffles, muffins, crackers, pizza crust, and even quick breads. Using discard is a fantastic way to minimize waste and add a unique tangy flavor to your bakes. Don’t forget to check out our website for more sourdough discard recipes.
10. How long does it take to create a sourdough starter from scratch?
It typically takes 7 to 14 days to create a robust and active easy sourdough starter from scratch. The exact duration can vary based on factors like kitchen temperature, the type of flour used, and consistency of feeding.
Disclaimer: Please note that some of the links on this page are affiliate links. This means that if you click on the link and make a purchase, we may receive a small commission at no additional cost to you. We only recommend products we genuinely believe in and use ourselves.