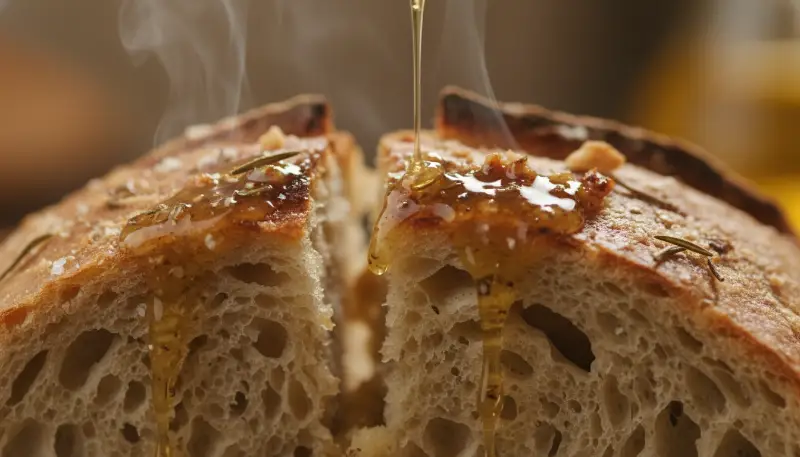
Mastering the art of Crispy Sourdough Bread is now within your reach, with this comprehensive guide to baking the perfect sourdough, ensuring a delicious sourdough loaf every time.
Imagine slicing into a loaf of freshly baked sourdough, the crust crackling beneath your knife, revealing an airy, open crumb. That satisfying crunch, the tangy aroma, and the chewy interior are the hallmarks of truly perfect sourdough. While it might seem daunting, achieving this quintessential crispy sourdough is simpler than you think with the right techniques and a little patience. This ultimate sourdough recipe will guide you through every step, transforming your kitchen into an artisan bakery. Get ready to bake a truly delicious sourdough that will impress everyone.
To truly master your kitchen and streamline your baking process, having the right tools makes all the difference. While your dough is rising, you might consider preparing a roasted red pepper soup to accompany your freshly baked loaf. For silky-smooth results, we highly recommend the Ninja BN751 Professional Plus DUO Blender, renowned for its high-power performance, ideal for making smooth tahini sauces, soups, and purees.
Beyond bread, this recipe will inspire you to explore more culinary delights. For quick side dishes, like roasted garlic or crispy vegetables to pair with your sourdough, the Cosori 9-in-1 TurboBlaze Air Fryer 6 Qt is an invaluable tool. It roasts chickpeas and vegetables perfectly with less oil and boasts a large family capacity, making meal prep a breeze.
For crafting delicious toppings or spreads, a reliable food processor is essential. The Cuisinart 8 Cup Food Processor is a meal prep essential, offering fast chopping, slicing, and shredding, perfect for whipping up a quick pesto or hummus to enjoy with your easy sourdough.
After all your hard work, proper storage is key. For keeping your flour, fed starter, or even your ingredients prepped for the next batch, the Rubbermaid Brilliance Glass Storage Set of 9 is excellent. These crystal clear, leak-proof, and stackable containers are perfect for storing leftovers and meal prep with ease.
For those who love to buy ingredients in bulk, or want to extend the life of your precious sourdough flour, a vacuum sealer is a game-changer. The FoodSaver Vacuum Sealer Machine keeps ingredients fresh up to 5x longer and prevents freezer burn, ideal for stocking up and ensuring your ingredients are always ready for your next perfect sourdough loaf.
Ingredients for Crispy Sourdough Bread

- 100g Active Sourdough Starter (Levain), ripe and bubbly, fed within 6-12 hours
- 400-500g Bread Flour (King Arthur Unbleached Bread Flour recommended), plus more for dusting
- 50g Whole Wheat Flour (optional, for flavor and fermentation boost)
- 55g Rye Flour (optional, for added flavor, use less than ¼ of total flour)
- 300-400g Filtered, Dechlorinated, or Spring Water, lukewarm
- 9-18g Fine Sea Salt or Kosher Salt (1.5-2.5 teaspoons or 2% of flour weight)
- 12g Olive Oil (optional, 1.5 tablespoons, for chewiness and softness)
- 2 teaspoons Diastatic Malt Powder (optional, for golden color and stronger rise)
- White Rice Flour (optional, for dusting banneton)
Step-by-Step Instructions for Crispy Sourdough Bread
- Feed the Sourdough Starter: 8-12 hours before you plan to mix your dough, ensure your sourdough starter is active and bubbly, ideally at its peak. This usually means discarding most of it and feeding it equal parts flour and water by weight. If your starter is stored in the fridge, remove and feed it a day or two prior to ensure it’s vigorous. For more details on maintaining your starter, check out our sourdough starter guide.
- Mix the Dough (Autolyse/Fermentolyse): In a large bowl, whisk together the active starter and warm water. Add the flour (bread flour, whole wheat, and rye if using) and salt (and olive oil, if using). Mix by hand or with a wooden spoon/dough whisk until a shaggy dough forms and no dry flour remains. Cover the bowl and let it rest for 30-60 minutes. This initial rest, known as an “autolyse” or “fermentolyse” (when starter is included), allows the flour to hydrate fully and gluten development to begin. Using high-quality bread flour is key for a good crumb.
- Bulk Fermentation with Stretch and Folds: This is the first rise, typically lasting 4-12 hours at room temperature (around 70-78°F or 21-26°C), depending on your environment and starter activity. During the first 2-4 hours, perform a series of “stretch and folds” every 30 minutes. To do this, grab a portion of the dough, stretch it upwards, and fold it over to the center. Rotate the bowl 90 degrees and repeat. This builds strength and elasticity in the dough. The dough should increase in volume by roughly 50%. Over-fermentation is a common mistake; if needed, the dough can be refrigerated after the stretch and folds to slow the process.
- Pre-shape and Bench Rest: Gently turn the dough out onto a lightly floured surface. Loosely shape it into a round (boule) or oval (batard). Let the dough rest, uncovered, for 20-30 minutes to relax the gluten.
- Final Shaping: Shape the dough into a tight boule or batard, creating surface tension. Place the dough seam-side up into a floured banneton basket or a bowl lined with a floured cloth (rice flour is often recommended for dusting to prevent sticking).
- Cold Proofing (Final Proof): Cover the shaped dough and refrigerate it for a minimum of 5 hours, ideally 12-48 hours. Cold proofing slows fermentation, allowing for deeper flavor development, improving structure, and making the dough easier to handle and score. Learn more about cold proofing benefits for your sourdough.
- Preheat Oven and Dutch Oven: Place a Dutch oven (or other lidded baking vessel) with its lid in your oven and preheat to a high temperature, typically 450-550°F (230-290°C), for at least 30 minutes to 1 hour to ensure it’s very hot.
- Score and Bake:
- Carefully remove the hot Dutch oven from the oven.
- Gently invert the cold-proofed dough onto a piece of parchment paper.
- Using a sharp knife or bread lame, score the dough with your desired pattern (a simple “X” is common).
- Using the parchment paper as a sling, carefully lower the dough into the preheated Dutch oven. For an extra crispy crust, some recommend spraying the dough with cold water and adding 2-3 ice cubes between the parchment and Dutch oven to create steam.
- Cover the Dutch oven with its lid and place it back in the oven.
- Bake for 20-30 minutes with the lid on, typically at 450-550°F (230-290°C).
- Remove the lid, lower the oven temperature (often to 400-450°F or 200-230°C), and continue baking for another 10-20 minutes until the crust is deeply golden brown and crackly, and the internal temperature reaches 205-210°F (96-99°C).
- Cool Completely: Transfer the baked bread to a wire rack and let it cool completely for at least 1-2 hours, or ideally 4-6 hours, before slicing. Slicing too early can result in a gummy interior due to trapped steam.
Crispy Sourdough Bread: Frequently Asked Questions
1. How do I get a crispy crust on my sourdough bread?
To achieve a crispy crust, bake in a preheated Dutch oven and use steam during the initial baking phase. This can be done by keeping the lid on the Dutch oven or by placing a tray of water in the oven. Baking at a high temperature initially and then reducing it also promotes crust formation.
2. Why is my sourdough bread dense?
Dense bread can be caused by under-proofing, over-kneading, or using flour with low protein content. Ensure sufficient rise time and avoid adding too much flour during handling.
3. How long does it take to make sourdough bread?
The entire process, from mixing to final bake, typically takes 24-48 hours, including bulk fermentation, shaping, and cold proofing.
4. What is a sourdough starter and how do I create/maintain one?
A sourdough starter is a live fermented mixture of flour and water containing wild yeast and bacteria that makes the bread rise. To create one, combine equal parts flour and water and feed it regularly. To maintain it, feed it daily if at room temperature or once a week if stored in the fridge.
5. Why does sourdough need to rest in the fridge before baking?
Cold proofing (refrigeration) slows fermentation, allowing the dough to develop deeper flavors. It also improves the bread’s structure and makes it easier to handle and score before baking.
6. What kind of flour is best for sourdough bread?
Bread flour with a high protein content (12-12.5%) is generally recommended for good structure and a chewy crumb. Whole wheat, rye, or other whole-grain flours can be added for flavor and texture.
7. My sourdough dough is too sticky – what should I do?
Sticky dough is common. Try wetting your hands when handling it. An “autolyse” (initial rest after mixing flour and water) also allows the flour to absorb water, making the dough more manageable.
8. How do I know when my sourdough dough is ready to bake?
After cold proofing, the dough should feel slightly springy and show signs of air bubbles. A gentle poke with your finger should result in the dough slowly springing back.
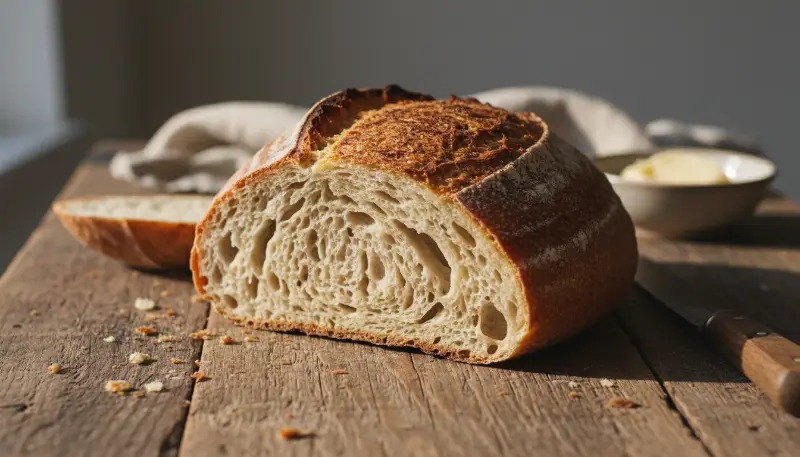
9. What should a perfectly baked sourdough bread look like inside and out?
A good sourdough loaf typically has a crispy, golden, deep brown crust, and an airy, lacy, open crumb with irregular medium to large holes. It should feel light to the touch.
10. Can I substitute a sourdough starter for a levain?
Yes, a ripe, bubbly, active sourdough starter that is 100% hydration can be substituted for a levain, though a levain is sometimes preferred for a “power feed” and potentially better bread.
As an Amazon Associate, I earn from qualifying purchases. This means if you click on a link and make a purchase, I may receive a small commission at no extra cost to you. These recommendations are based on my genuine belief in the products’ quality and usefulness.